The purpose of my long exposure unit was to distort landscapes with people in them to show the everyday hustle and bustle of the city in a different way.
Brainstorm

Mood Board

Brian Yen
|
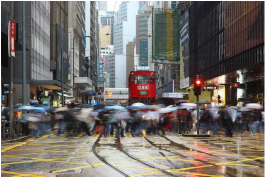
Brian Yen is based in Hong Kong and uses long exposure photography to capture the movement and liveliness of the city. He captures these moments which create a blurry effect of bright lights and city movement. By using one of the most populated and fast paced cities in the world, he is able to create stunning shots.
|
|
|
|
|
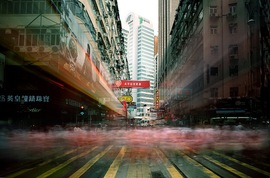
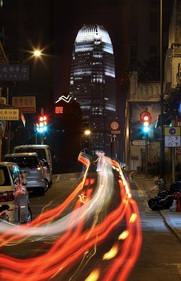
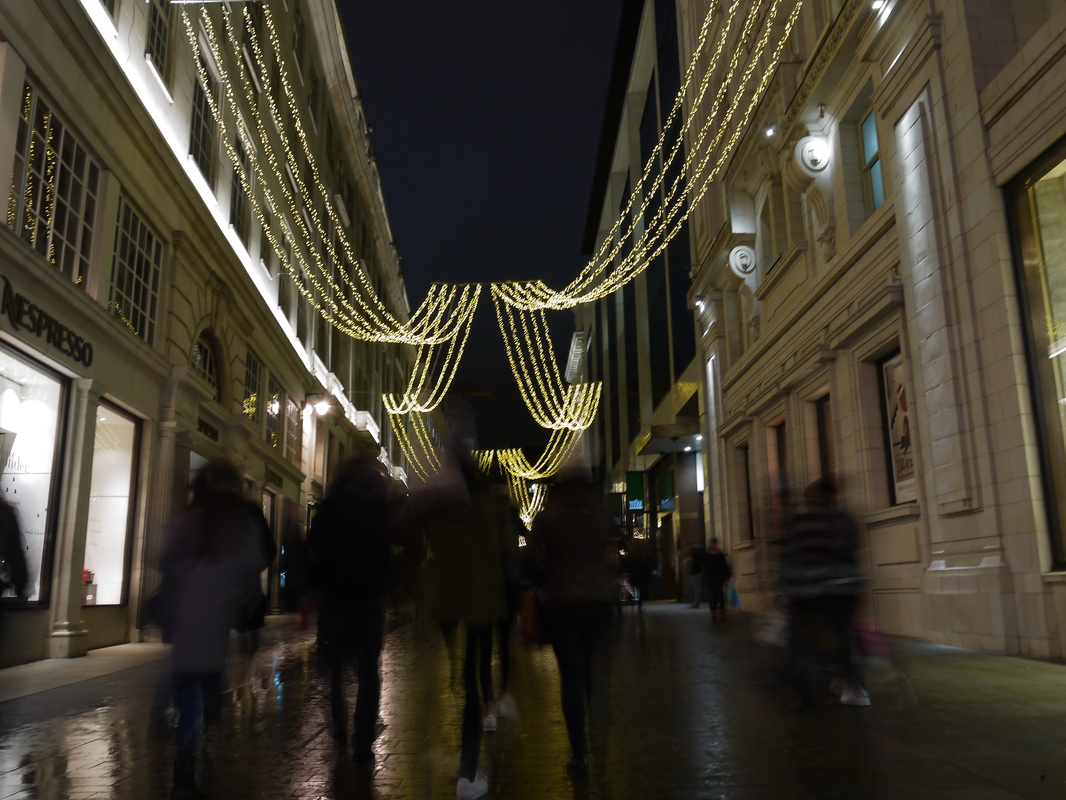
This is one of my favourite photos by Brian Yen as the light trails from the traffic create an effect that it is the only movement in the photo, surrounded by the stillness of the city. The main focus of the image is a blur of colour which can be pleasing to the viewers eye and gives a smooth finish to the shot. The fact that Brian Yen has placed the light trail in the middle of the photograph, makes this the main focus on the shot and also makes the photograph look more aesthetically pleasing due to the symmetry of the shot. The bright colours of the light trail contrast against the dull night time shoot and dark atmosphere of the photograph. This adds to the mood of the photograph, lightening it slightly and giving the audience something more to look at. I would like to use this style to develop my idea of light and colour.
|
|
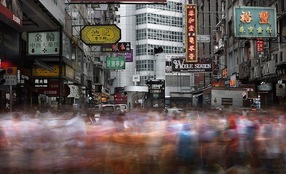
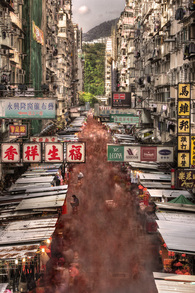
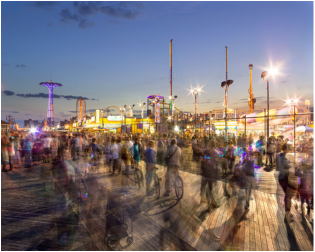
This is another one of my favourite images by Brian Yen as it shows the densely packed streets of Hong Kong. In this image, the large amount of people are used to portray movement rather than lights. The blurriness of the active streets is surrounded by the still buildings which also show a lot of details however, the focus of the photo is still the movement of the bustling city. Like in the other shot, Brian Yen has made the surroundings of the photograph look sharp which contrasts against the 'ghost effect' of the people which he has achieved through long exposure. I like how the people in the photo are very blurry, almost looking like a river of people however there is still something to look at. The photograph is also pleasing to look at due to the symmetry of the narrow streets.
|
|
Matthew Pillsbury
|
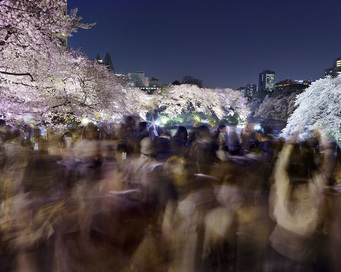
Matthew Pillsbury is an American photographer who is currently working on a new project that is being photographed in and around New York City. He is known for his long exposure photography and uses everyday life to represent movement. Pillsbury is known for his use of black and white long exposure photographs, although he does also involve colour and lights into some of his work. He also photographed various cities in the Japan and the focus was around Tokyo.
|
|
|
|
|
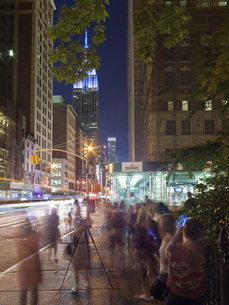
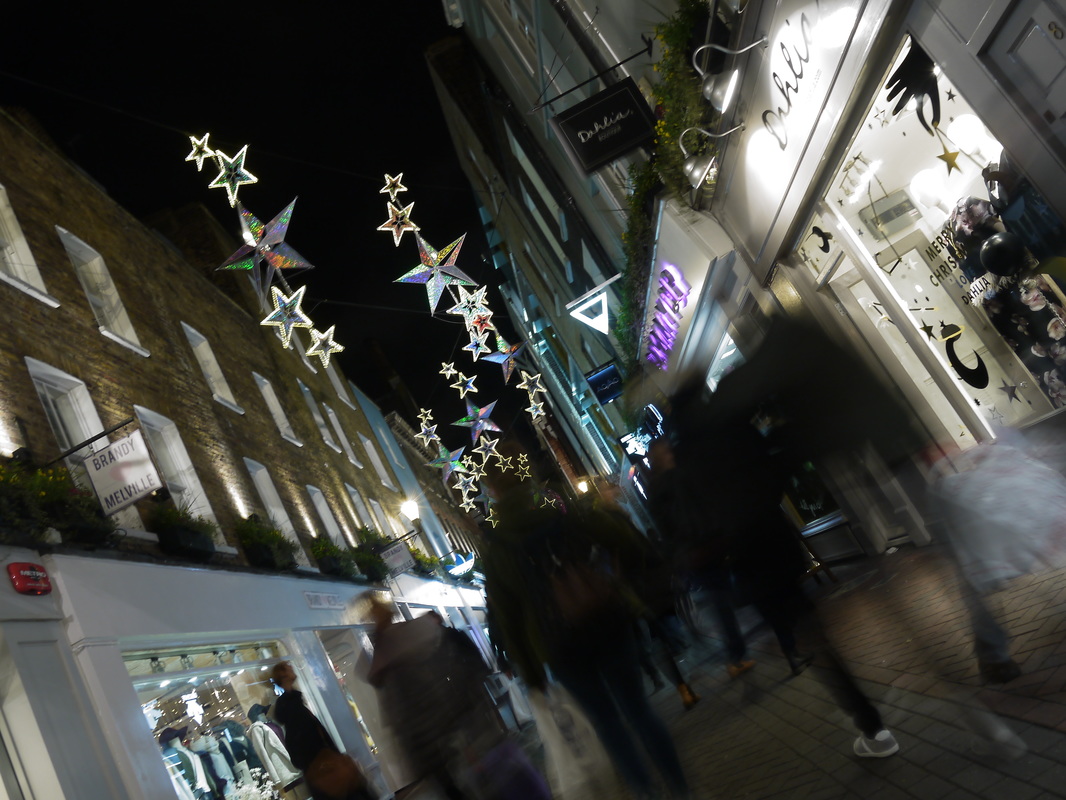
This image by Matthew Pillsbury is one of my favourites as the light trails and the movement of people are both included in the shot. By adding both the movement of traffic and people in the shot, Pillsbury is able to show the busy setting of the city with the stillness of the background around it. Pillsbury has used long exposure to change the effect of both the people and traffic. The long exposure is significant in this photo as it portrays the movement and fast pace of life in a city that is as alive as New York. This is effective as it shows the viewer the everyday movement of the city which has been captured in a still image. The colours in this photograph also add to the composition as they are bright and makes the photograph look even more alive, along with the movement of traffic and people.
|
|
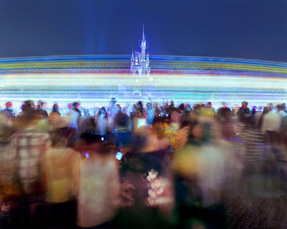
This image also links to my idea of light and colour, making it another favourite. The image is set in a busy place which makes it easy to capture movement effectively. There are subtle lights surrounding the crowd which gives another dimension to focus on in the picture while the crowd is still the main object. This 'Ghost' effect creates a sense of movement and captures the liveliness of such a compacted, crowded area in one shot that wouldn't be attainable otherwise. I would like to use this in my photoshoots and final pieces as I like the idea of creating movement in a still image making it look more alive. I like the lights and colours on the trees and the lights coming off peoples phones which fits my theme of light and colour. It adds to the composition of the photograph, making it look more appealing for the viewer.
|
|
Idea sheets
|
|
|
|
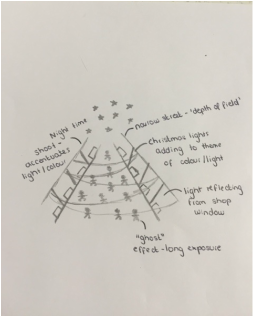
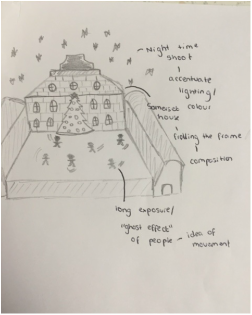
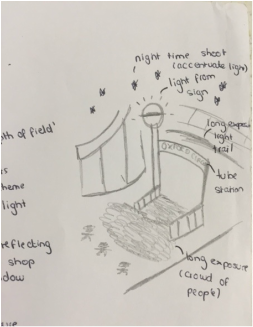
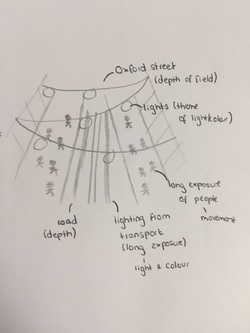
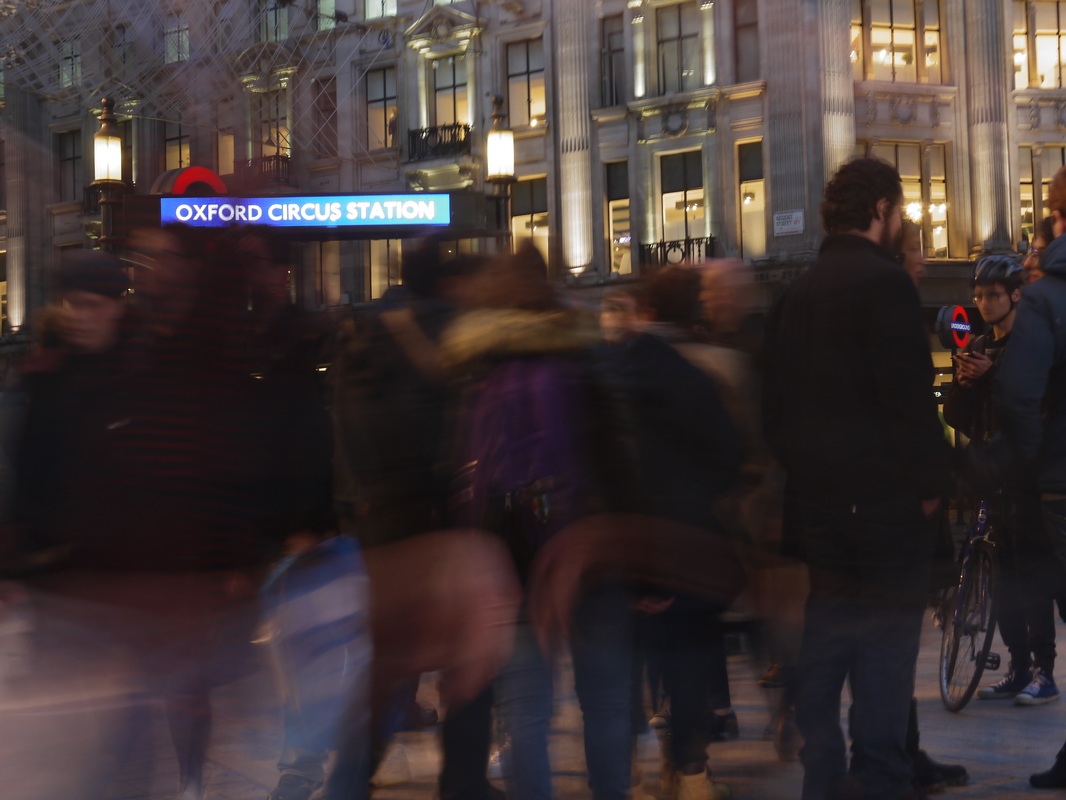
The first idea for my final piece is that I will use long exposure to convey the movement of people. I will go to Somerset house as people ice skating will be a good way for me to capture movement and create the 'ghost effect'. Using Somerset house will also ensure that the composition of the photograph will be good. My second idea is to stand in the middle of Oxford Street and also do night time shoots to accentuate the lighting and colours from transport and shops. This is a busy place so I will be able to achieve the 'ghost effect' of people using long exposure and also make sure that I have good composition of the photograph by being aware of the background. My third idea is to capture movement of a huge crowd of people. A good place to do this is at a tube station during rush hour as there is a huge amount of people so I can achieve the blurry effect which will add to the composition of the photograph. The light and colours from the buildings in the background and the tube station sign will also add effects to the photograph and fits my theme of light and colour.
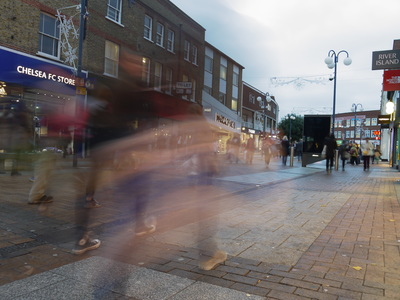
Photoshoot 1 - Artist Replication - Kingston
The objective of this photoshoot was to focus on the movement of people and the use of long exposure to create a 'ghost effect'. I went around different places in Kingston to get a range of photographs that have different amounts of movement and liveliness. I did manage to get the desired 'ghost' effect, however as this was a test photoshoot, the location was not aesthetically pleasing and also it was not busy enough to achieve the images that are of the same standard as the artists that I have researched. In my next shoot I will focus on the location and take note of how busy certain places are in order to create final pieces that portray the everyday hustle of cities by using distortion.
Top 2
|
|
I chose these two images to be my top 2 as they both convey movement of people using the 'ghost effect' which was successful due to long exposure. However, this photoshoot was not fully successful as I need to focus on the background so the photo itself is a good landscape photo with the blurry movement of people adding to the composition of the photograph. I also need to take photographs in places where there is more movement of people as Kingston was not busy enough to create the desired effect.
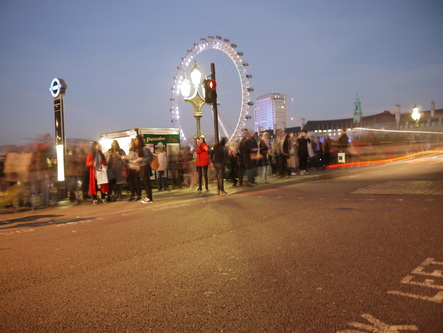
Photoshoot 2 - Southbank/Waterloo Bridge
The objective of my photoshoot was to capture movement using long exposure. I used the moving traffic and movement of people in the city to my advantage as it captures the fast paced movement of everyday life. This time I focused on the location and decided to go into Central London as this is a place that is almost always busy and I would be able to get some successful images of moving people. Due to me standing along a road, I also managed to achieve some light trail effects which also added to my idea of distorting a landscape to show movement in a city. This is another idea that I will take on to my next photoshoots and I will photograph moving traffic as well as people to make the images look more interesting.
Top 2
|
|
I chose these two images to be my top 2 as the shots both convey the idea of movement well due to long exposure. Both photographs involve lighting which also help manipulate the image further and gives a distorted and unique effect. There are certain aspects of the photograph like people and buildings which are still. This accentuates the movement around them and further conveys the idea of movement. However, even though the landscape was a lot better than in my last photoshoot, it still doesn't look as aesthetically pleasing as I would like it to and therefore next time will use a different location such as Oxford Street where I can also focus on depth.
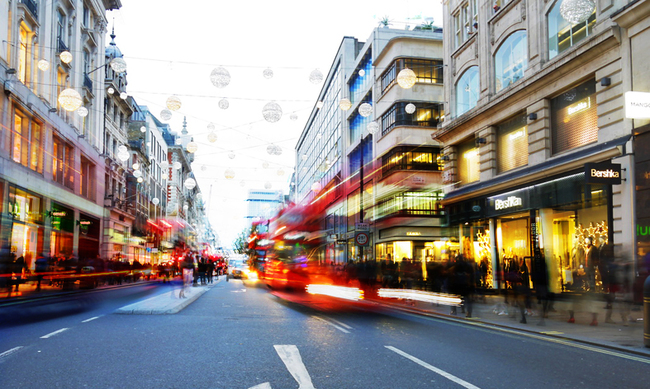
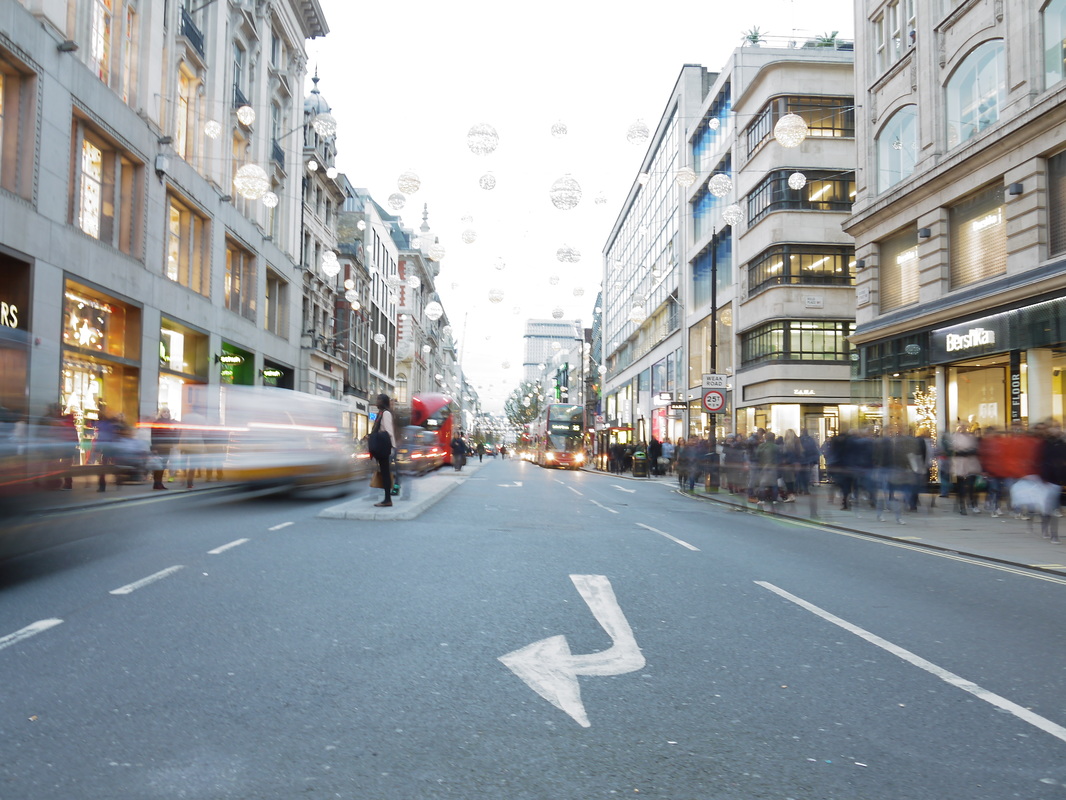
Photoshoot 3 - Oxford Street
The objective of this photoshoot was to capture movement to add to the composition of the photograph. I focused on the backgrounds of the shots so they make good landscape photographs with the 'ghost effect' of people adding to the composition and the end result of a photo. I like how these images contain a lot of depth due to me standing on an island in the middle of the road which makes them look more three dimensional rather than flat. As it was daytime, the first few images are a bit over exposed due to the shutter having to be left open for longer to achieve long exposure and I found that I managed to take better photographs in the evening when it was darker.
Top 2
|
|
I chose these photographs as my top 2 as they both capture movement through long exposure. The blur effect of people adds to the composition of the landscape photograph. The backgrounds of the photographs are good stills that are in contrast with the moving traffic and people. This conveys the idea of the liveliness and busyness of a fast moving city such as London. I also made sure that the backgrounds were aesthetically pleasing to the viewers eye which also made the photos well composed.
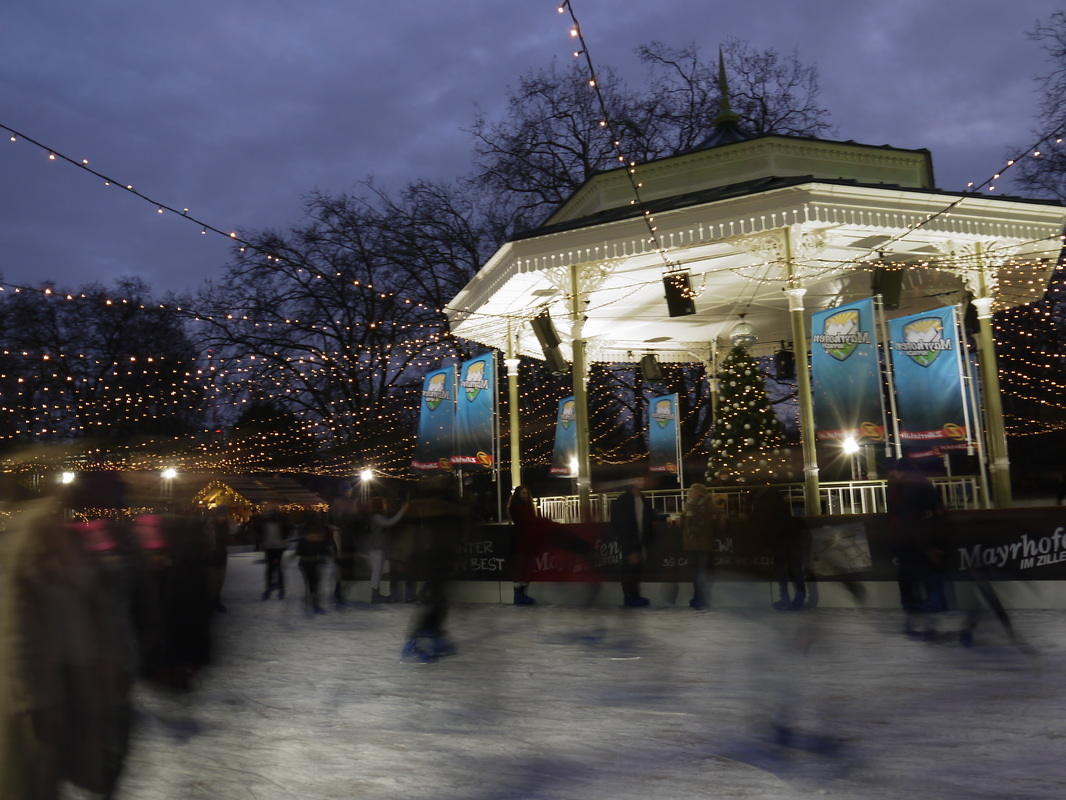
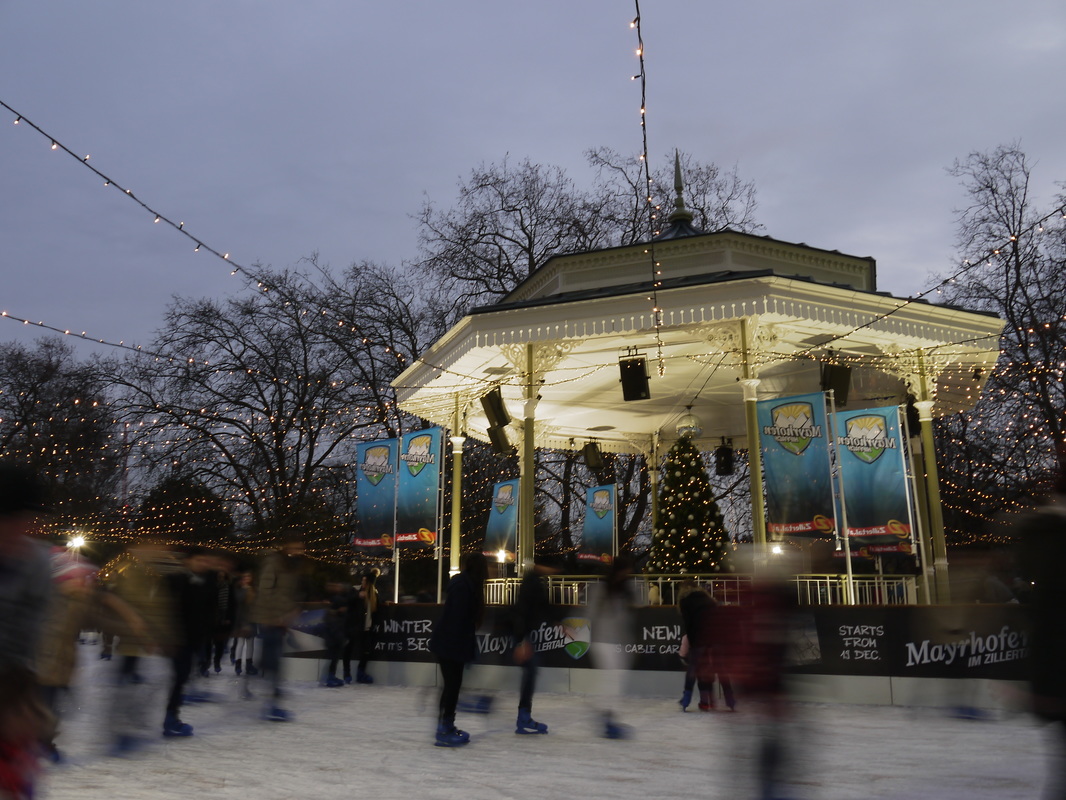
Photoshoot 4 - Hyde Park
The objective of this photoshoot was to focus more on people and capture movement in a busy place. The fact that people were ice skating helped me achieve the effect of 'ghost people' well as they were moving fast and I did not have to leave the shutter open for long. The background is well composed with the gazebo and lights, helping me portray my theme if light and colour well, along with the long exposure of people adding to the composition of the final photograph. I used the Winter Wonderland ice rink as it has an appropriate background which gives me a good landscape shot with the blurry effect of fast paced movement adding to the composition.
Top 2
|
|
I chose these as my top 2 as they both consist of a large amount of people which allowed me to create the 'ghost effect' successfully which gives the audience an idea of the busyness and liveliness of the ice rink. I also used the dull weather to my advantage as the main focus of light was the fairy lights coming out from the gazebo and the lighting in the gazebo itself. The sky and the lighting all add to my theme of light and colour.
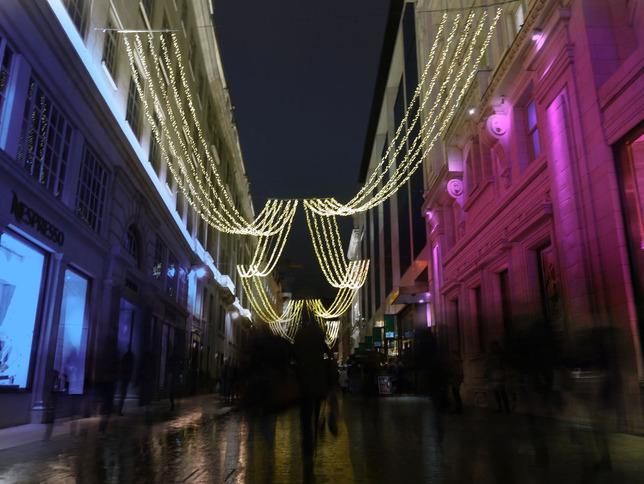
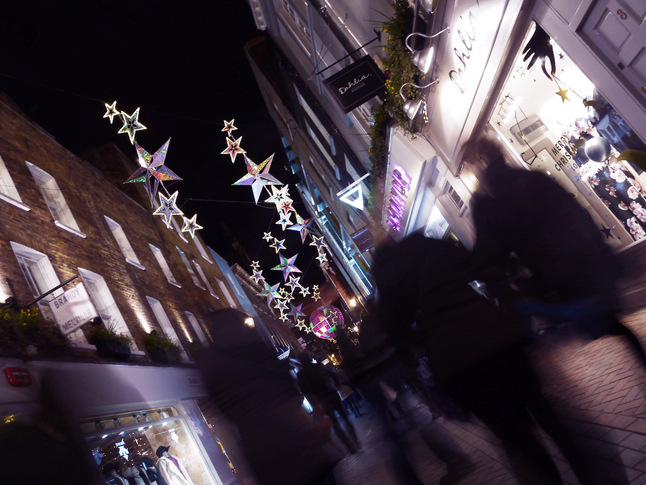
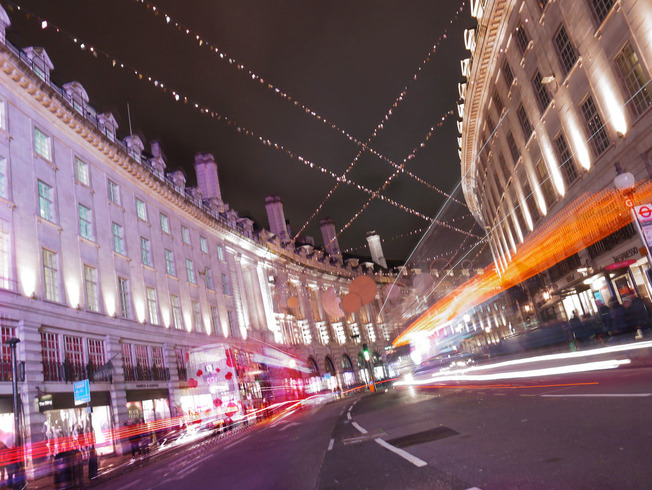
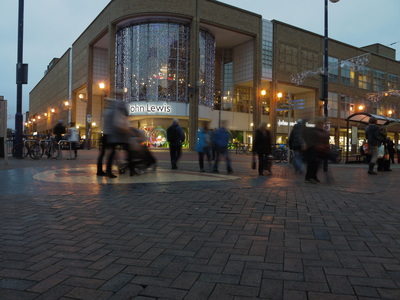
Photoshoot 5 - Central London - Carnaby Street, Somerset House, Regent Street
The objective of this photoshoot was to capture images that I would use in my final pieces. I went to a variety of different places that had lots of depth, for example narrow streets which help me use depth of field in my final pieces. I also went to Somerset House so I could develop my idea of capturing movement of people further. In my last photoshoot the composition of the photo without the people would not have been as strong so I went to a place which would help me create a good blur effect using long exposure and to add to the composition as well.
Top 2
|
|
I chose these two photos as my top 2 as they both include depth of field. The narrow streets allowed me to achieve depth of field effectively and the busyness allowed me to create the ghost effect using long exposure successfully. As I took these photographs in narrow streets which meant that there would be a lot of depth, this improved the overall composition of the images and meant that they are more aesthetically pleasing to the viewer compared to an image which is two dimensional or flat.
Photoshop experimentation
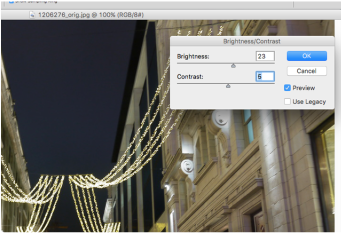
Firstly, I changed the brightness and the contrast of the photo so I was able to control the darkness of the photo. Some photos came out a bit dark so if I slightly changed the brightness they would become more appealing.
|
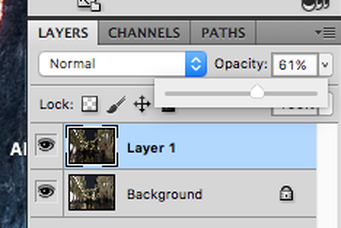
Secondly, I copied and pasted a second photo onto my first photo which creates another layer. This is so I could add more people into the shot, making it seem more busy. I then changed the opacity so I could place the image directly above the other one so it would line up.
|
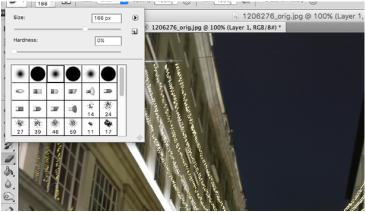
I then used the eraser tool to get rid of any unwanted parts of the photo in the layer. This allows me to adjust the buildings as they may become blurry due to the layering of photographs. I used a very large eraser and made sure that it was very soft so the harsh edges of the photo could be eliminated effectively.
|

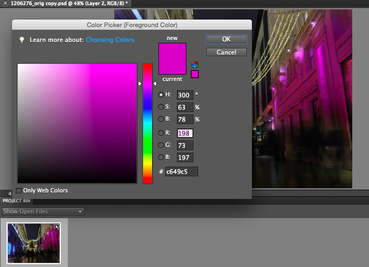
Next I changed the overlay effect which allowed me to give the photograph a different and unique feel, depending on which effect I chose. The effect I chose depended on the photograph as the lighting affects the way different overlays look,
|
|
|
Lastly, I added colour to this photograph using the brush tool. Like with the eraser, I made sure that I used a large and soft brush so the colour application wouldn't be too heavy. This effect allowed me to make this photo more unique and distinctive as it looked a little bland before so this gave it colour and made it stand out.
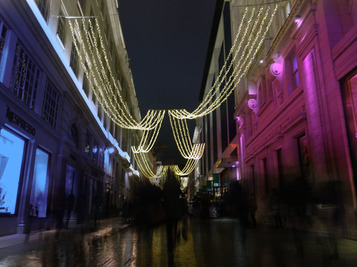
Final Pieces